Automated builds and code deployment (Part 4 - Promotion)
Read the other posts in this series:
Why Create an AX Build Server/Process?
Part 1 - Intro
Part 2 - Build
Part 3 - Flowback
Part 4 - Promotion
Part 5 - Putting it all together
Part 6 - Optimizations
Part 7 - Upgrades
In this installment of the Automated Builds and Code Deployment series, I’m going to cover what is probably the most important component of the build process: Promotion.
The Promotion process should be the only way new code leaves one environment and enters another. Our promotion cycle is fairly straightforward: Dev => Beta => Build => UAT => Staging => Production. Projects should hit most, if not all, of these environments and must go through them in that order. We have found that Beta is really the only environment that can be skipped, but should only be skipped for very minor changes (for example, adding a single field from an existing data source on a report).
Again, we are using the Template feature of TeamCity 8.0+ to help manage our configurations. Similar to our Flowback processes, we have a template definition of a variable, Working Directory, which needs to be defined in the implementation of each build configuration.
Our non-production promotion process consists of 7 steps:
- Shut down AX Server Process
- Copy Build files
- Remove AOS temp/cache files
- Update AX database
- Copy Version Control attributes
- Start AX Server Process
- Synchronize Data Dictionary
The production promotion process is very similar, with 7 steps, but with some slight changes:
- Shut down AX Server Process
- Copy Build files
- Remove AOS temp/cache files
- Copy Version Control attributes
- Start AX Server Process
- Synchronize Data Dictionary
- Backup Production Database
As you can see, the biggest difference is the Production Promotion does not update the database (for obvious reasons), but instead backs it up. I’ll go into more details in my next post, which will bring everything together and outline how each of the pieces interact with each other as a total Lifecycle Management system.
Process Configuration
Each individual process has an Artifact Dependency on the AX Build Process. The process itself should define the criteria for which build it should take. For example:
- UAT Promotion should take the last successful build
- Staging and Production should take the last pinned build
During execution, TeamCity will automatically lookup the last build that meets the criteria and download the artifacts that were saved in that build.
Additionally, we have the artifact paths set to1
BuildFiles.zip!*.*=>AX Build Files
This means the build agent that is running this will automatically extract all the files it finds in the BuildFiles zip file (which is created during the build process) and extract them to a folder named AX Build Files. This path will be referenced in future scripts so we can move the files where they need to go.
Stop AX Server Process
Because we will be manipulating the server binaries, our first step is to shut down the AX server (or servers). Originally, we used a batch script for this step. However, because we cannot specify the timeout, we would sometimes run into issues where the service did not finish shutting down or starting up before the rest of the process occurred. So instead we are using a simple PowerShell script:
1 | stop-service -inputobject $(get-service -ComputerName "[AOS Server 2]" -DisplayName "Dynamics AX Object Server 5.0$*") -WarningAction SilentlyContinue |
As you can see, we are stopping each process sequentially and in reverse order. In reality you can stop the processes in any order. Also, because we are using PowerShell stop-service, the script will naturally wait until the service has finished stopping before moving to the next line. If something causes the AOS Server 2 to not stop at all, AX will still be available because Server 1 and the Load Balancer are still up. The -WarningAction flags will prevent the warning messages (“WARNING: Waiting for service ‘[Service name]’ to finish stopping…”) from showing the TeamCity logs.
Copy Build Files
As mentioned before, the files from the build are automatically extracted to a folder that we can reference. We cannot just extract them to the AX Server folder because the extraction process occurs before the first defined step, meaning the files will be in use. Instead, we will just copy them there now that the server is offline:
1 | @echo off |
The AX Build Files folder will be in the root build directory, which is two levels up from where the script resides. Additionally, we have the server files shared across the network to the build server, which allows us to update all the files remotely. There is also some generic error handling at the bottom, since xcopy won’t actively throw any error codes if there was an issue.
Remove AOS temp/cache files
This step is another simple script which removes the now old temp and cache files the AX server uses to help make things run faster. If they aren’t removed, the server may continue to use the old code, which could cause issues for uses. These files will be re-built with the new codebase once the first AX server starts up.
1 | @echo off |
As you can see, I’m only targeting some of the temp/cache files:
ALC = Application Label Cache files
ALI = Application Label Index files
AOI = Application Object Index files
You can additionally remove more files if you like, but only keep to those ending with the letter C or I. You can find more details on what each file extension means at http://www.artofcreation.be/2009/10/27/application-file-extensions/.
Update AX Database
This is only for non-production promotions, and is very similar to the Database Update step of the Flowback processes. We restore the current backup of production into the specific server’s database, and run a SQL update script that points necessary system values to the correct values for the environment.
Copy Version Control Attributes
This is probably one of the more tricky scripts. Because we use the built-in AX MorphX Version Control system, and this information is only entered with the code back in Build, we need a way of bringing the information forward to each system. We use a PowerShell script to manage this process.
Additionally, we have a modification in our system which tells us which the internal build number that the system is running, and when it was originally created/approved:
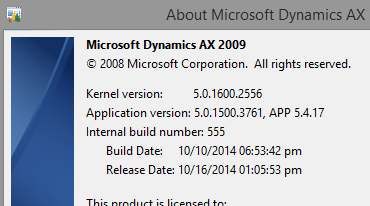
This information is stored in the database on the SysEnvironment table, and since it directly relates to the version information, we update it during this process. All the information comes directly from TeamCity using the REST API. Additionally, each database server is linked with the previous database server in line (IE, UAT has a link to Build, Staging has a link to UAT, and Production has a link to Staging).
In this case, the script takes a number, which represents the build ID (not to be confused with the build number). This is passed into the script from the TeamCity configuration.
1 | param([Int32]$buildId) |
Each of the queries is run on the destination SQL server, so the information is ‘pulled’ forward. Additionally, it will only take version notes that were created before the current build. This allows multiple builds to be in the system, without the version information being passed upstream.
The biggest risk with this setup is if you need to roll back Build before a production promotion occurs. If you do not load the same elements in the same order, you run the risk of the RecID on the version control tables getting out of sync.
Start AX Server Process
Now that all the database maintenance has been completed, we start up the AX processes again:
1 | start-service -inputobject $(get-service -ComputerName "[AX Load Balancer]" -DisplayName "Dynamics AX Object Server 5.0$*") -WarningAction SilentlyContinue |
Again, this is a PowerShell script, so we can take advantage of the indefinite wait while each process starts up. You may also notice that we start the processes in the reverse order we shut them down. While this is not necessary for everyone, it is something that should be kept in mind.
Our license allows for 2 concurrent AOS servers, and technically an unlimited number of load balancers (since they do not consume a server license). However, when starting up the load balancer, the process is not yet aware that it is a dedicated load balancer, and consumes a license. During a normal startup this license would normally be released in a few seconds. However, since we deleted the cache/index files earlier, and it is the first server process to start, it will rebuild all those files prior to releasing the license.
The end result of all this is that if we do not wait for the load balancer to finish starting up, the second production server (the third in the list) will not start at all.
Also, this step has a slight configuration change compared to the previous steps. All the previous steps are configured to only execute if the build status is successful. This means that if any step fails, the subsequent steps will not run - a helpful feature, especially when the server processes fails to stop. However, this step is configured as “Always, even if a build stop command was issued.” This allows the servers to always come back online, even if the promotion was a failure or manually stopped.
Synchronize Data Dictionary
This step ensures that the database schema matches what the code says it should. Since the database was restored earlier (for non-production environments), this applies any database changes that have been introduced since the last production promotion.
Backup Production Database (Production only)
This step is only in the Production Promotion configuration. I will explain more about why this step is here in my next post, but for the time being the step is relatively simple: backup the production database to a network location. The backup is then used in all the other processes to restore to a production-like status.
And that’s how we run our promotions. Manually promoting is just a button click away, and the total system downtime is minimized. For non-production promotions, the average time to run (from shutdown to completion of the database sync) is about 40 minutes. For the production promotion, average system downtime is about 30 minutes. The total time to run (including the database backup) is about 2 hours. This gives us a lot of flexibility in scheduling our updates with minimal downtime.